Painting a ceiling is tricky, even for professional painters in Temecula like us. Over the Thanksgiving week, we halted our operations here at My Wall Works and gathered the entire crew to craft the following step-by-step instructions describing how to paint a ceiling for our Temecula neighbors.
If you’ve chosen to paint your ceiling yourself, this task may seem over your head. (See what we did there?) But worry no more, this guide will assist you in completing your project hassle-free.
After you’ve set up the room (link to last blog post), you will need to be sure you have all the equipment needed to paint a ceiling.
Equipment Guide:
– High-quality 3.5-inch angled latex brush. The reason we use these is because they are much more stable and can hold more paint than a little 2-inch brush.
– A roller brush with a stout roller pole. The brush should be 3/8-inch or 1/2-inch in thickness. If painting a ceiling with a popcorn texturing, we may even use a 3/4-inch or 1.25-inch roller brush.
Guide to choosing a roller:
– Smooth surfaces: 3/8 in.
– Semi-smooth surfaces: 1/2 in.
– Rough surfaces: 3/4 in.
– Very rough surfaces: 1.25 in.
Do not skimp on roller brushes – those 5 for $1 packs… stay away. The quality of your roller brush will make a big difference in the outcome of your paint job.
We always roll paint out of a 5-gallon bucket with a roller grid inside.
Painting the Ceiling
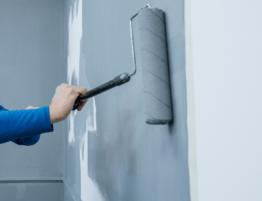
Cut the ceiling in all the way around the room. By “cut the ceiling in” we mean painting along the perimeter of the ceiling where it meets the walls. If the walls are going to be painted as well, we will also paint an inch down on the wall where it meets the ceiling. Begin in one of the corners in room. We like to cut in four inches from the corner on the ceiling and about an inch down on the wall. Most homeowners wouldn’t do this, but as professional commercial and residential painters here in Temecula, we always pay attention to details like these.
Pro Tip: Keep a Wet Edge
When painting a new section of the ceiling, always paint your last brush stoke into the “wet edge” – the previous section you just painted. This will prevent you from leaving start marks, which can really show up if you’re changing the color of the ceiling. Dip your brush often when cutting, be liberal with your paint.
If painting the ceiling and the wall the same color, cut down onto the wall just as much as on the ceiling. Remember to also cut in 4 inches from any fixtures with your hand brush.
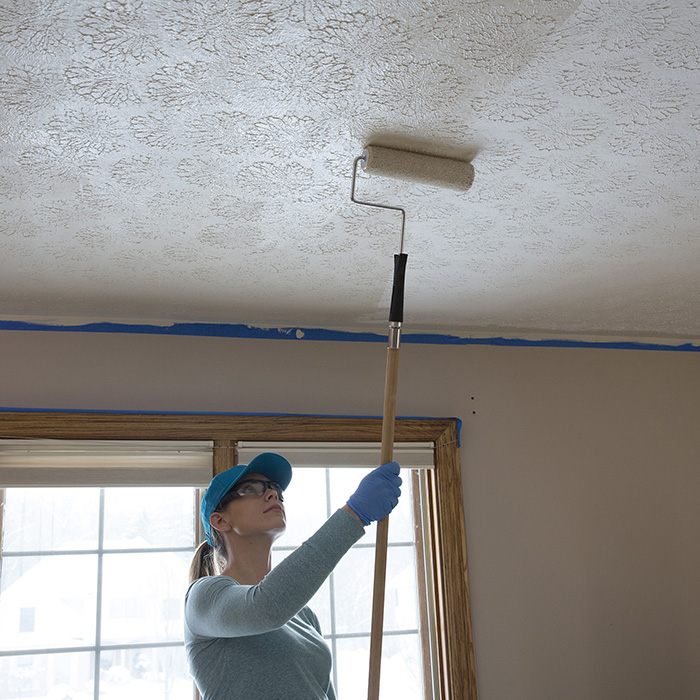
Once the entire ceiling is cut in, it is time to get out the roller brush. Clear the room of any unnecessary tools and equipment because you’ll be looking up at the ceiling and don’t want to trip over anything. NOTE: Spills and big drips can and will leak through canvas drop cloths and stain carpet so wipe up drips immediately with a rag.
Decide which direction you’re going to roll the ceiling. The prevailing wisdom among painters is that you roll toward the primary source of natural light that is coming into the room. If you roll perpendicular to that source of natural light, you may see a shadow where your roller lines are because the light will be coming right across them. On textured ceilings, the direction you’re rolling probably won’t make a big difference as long as you’re doing a nice, neat job rolling.
The Two-Step Process
The most important thing to remember when you’re painting a ceiling, or doing any interior or exterior painting for that matter, consists of two crucial steps.
First, you have to roll the paint onto the surface nice ’n’ thick. Don’t worry about being to neat or too precise – just get a good hefty coat of paint on there.
Second, you’ve gotta “lay it off” or in other words, go back to the beginning of that section and give it one final smooth roller stroke. Lay it on nice ’n’ thick and then lay it off nice ’n’ smooth.
Divide the Ceiling into Manageable Chunks
DO NOT lay on a thick coat of paint on the entire ceiling and then attempt to go back and smooth it out. Lay on a thick coat on one section of the ceiling, then lay it off before moving to the next section being sure to always paint off a wet edge. Avoid painting on any paint that has already dried – this will essentially be a second coat and you may end up creating an overlap mark.
When starting with a new roller brush, be sure to dip it into the bucket multiple times to really soak the new brush.
Roll on your first thick coat in a 4 ft. x 3 ft. section. Once the entire section has a thick layer, go back to where you started the section and lay it off. Making sure to finish each stroke a little past your starting point towards the center of the ceiling. Overlap your stokes by about 50%. Move on to the next section, following the same procedure.
To master ceiling painting like a professional Temecula painting service, remember these three keys to success:
– Always keep a wet edge
– Use the two-step process
– Manageable chunks
These painting processes and techniques are what separate the amateurs from the pro painters. If you can master these techniques, you could practically start your own painting service in Temecula!
Contact us today to schedule your free estimate.