It’s almost time to paint, but you aren’t sure how to prepare a room for painting. Don’t worry we have some tips to help you. If you’ve decided to DIY this project each step will help you. If you are hiring someone to paint for you they will let you know what needs to be done. Typically it will be removing things off the walls and furniture to the middle of your room. The rest of the prep will be handled by that company. Let’s dive in!
How to Prepare a Room for Painting
1. Clear and Clean the Room
The very first step in prepping a room for painting is clearing the space. Yes, this is obvious, but when we say “clear the room,” we’re talking about removing everything from the room you will paint. Many people think they can move large furniture around the room as they move onto each wall like a game of Four Corners. Moving large furniture only twice – once out of the room and once back in is more efficient. You will have more space to work, and it will save time.
As for cleaning the room, a vacuum with a brush attachment is perfect for cleaning baseboards, closet shelves, door trim, and around windows. Once the room is clean, lay out your drop cloths.
2. Fill Nail Holes
Fill nail holes and other punctures around the room. For efficient use of spackling, we use a “spackle sack.” Pro Tip: place a scoop of your spackle in a small (12 in. x 12 in.) piece of painter’s plastic. Wrap the plastic around the spackle and twist the plastic to create a sack of spackle. Tie the plastic and puncture a small hole at the top of the spackle sack with a nail or knife point. When pressure is applied to the spackle sack, the spackle comes out in a small amount, perfect for patching up small holes without wasting your spackle.
For larger holes, take a small scoop of spackle with your putty knife and scrape over the hole, ensuring to wipe the wall around the hole clean afterward.
3. Sand
Interior painting requires sanding doors, trim, spackled holes, and baseboards. This is a crucial part of the internal painting prep phase. Paint will cling more quickly to a rough surface. A sanding sponge does more than enough for this. Suppose the job requires painting over a fuse box or something similar, and that as well. Oh, and wear a dust mask!
After sanding, remember to vacuum everything you sanded over with the brush attachment on your vacuum.
4. Caulk
This process is frequently overlooked, but your local Temecula painting professional will always take advantage of this step. Caulk is necessary when gaps exist between the door trim, baseboards, molding, and the wall. Use a drip-less caulk gun and cut the caulk tube’s tip at a 45º angle. Pro Tip: have a small bucket of water handy. After running the caulk along the cracks, wet your finger with the water and trace your finger along the line of the caulk. Wetting your finger will help you manipulate the caulk much more accessible than if your finger were dry. Don’t forget to check all the joints in the door casings!
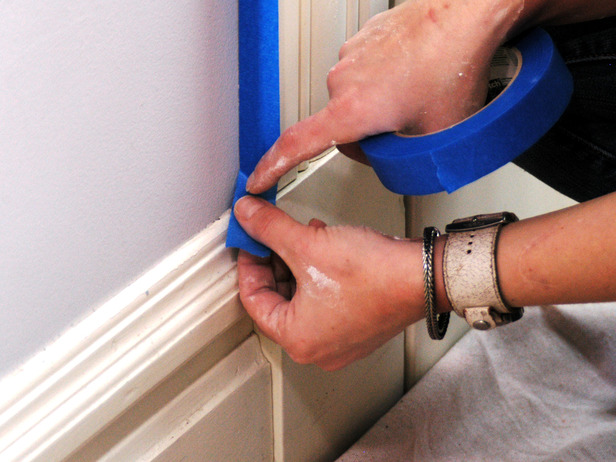
5. Mask
After the caulking has dried (about 24 hours), it is time to mask the room to roll the ceiling and the walls. Use masking tape to cover and protect the following: power outlets, light switches, lighting fixtures, and thermostats. Pro Tip: it’s a brilliant idea to use masking paper to drape over the tops of windows to keep unwanted paint from splattering onto the glass.
Once all fixtures have been taped and covered, finish the masking process with the door & window trim and baseboards. You must use precision and be very attentive to detail to place the tape in a consistent straight line along the edge and baseboards.
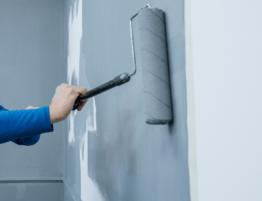
6. Prime
The key to priming correctly is to think like a surgeon – you want to apply just a tiny amount of primer to any patches, spackled nail holes, or stains, and be sure to “feather” the primer so it does not show up later. Pro Tip: if you have large patches or stains on your wall, we suggest using a weenie roller to help those more significant blemishes blend into the rest of the wall. Large brush strokes will show up later in the painting process. Doesn’t nobody have time fo’ dat!
For most interior priming, a good latex stain-blocking primer will be fine. If any metal surface is to be painted, like a fuse box, use an aerosol primer.
Now you know how to prepare a room for painting. The next question is if you are going to DIY or hiring someone. If you are ready hire a painter you can contact us today to schedule your free estimate. You can also check out our Yelp and Google reviews.